How to build a simple Win32 application
I’ve been on a quest to get down from Electron’s abstraction layers to go as low as (reasonably) possible, and on Windows it ends with Win32. It is a very old API which is still fully functional; in fact, most applications are still Win32 applications, and it will likely continue to be this way.
What is Win32
For the sake of simplicity, we can roughly split Win32 API into multiple areas:
- various low-level APIs (for example, that’s how you pass direct SCSI commands, access audio, etc)
- window management
- native UI controls
- low-level graphic access
Microsoft itself wants to modernize this API and it introduced WinRT in 2012. From my understanding, the original idea was to completely replace and provide a unified API layer available on all devices, so all modern applications were supposed to be UWP, but the API was not complete and not a lot of developers adopted it, so majority of the apps still used Win32.
At this point, Win32 and WinRT APIs coexist.
Win32 UI controls
Win32 UI controls are very old and are pretty much never used directly for decades at this point. They are still available, and if you find an application old enough, it can use them directly. Here is an example of an application I developed using them:
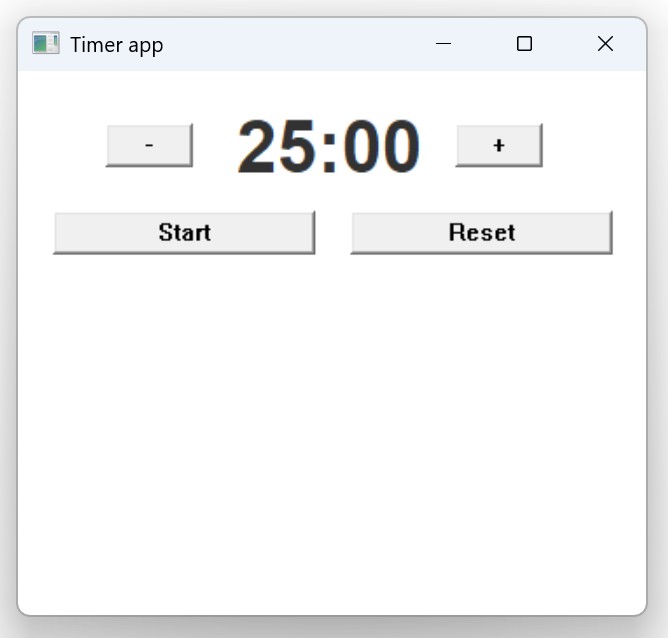 Even on modern Windows, you can still periodically encounter these controls
But I said that most applications are still Win32, so how come they don’t look like that? Well, the idea is that you only use window management functionality, message pump (to listen to all device events), and then write your own renderer using low-level graphic primitives. This is a very non-trivial task, and that’s why there are so few renderers:
- provided by the OS
- cross-platform renderers, e.g. Skia, which is used for Chromium, Flutter, etc (there are others, of course, like Qt)
A success of UI libraries on the Web platform can be attributed to the fact that DOM serves as an abstraction layer, which you can use to build your own framework on top of that; OS-provided frameworks are very opinionated and rarely expose convenient low-level access.
Structure of a Win32 application
Note: I personally used MSVC compiler, so you need to install Visual Studio and open
Developer Command Prompt for VS 2022, andmsbuildwill be in PATH in that terminal. If you want to see the project setup, check my repository.
In general, for a C/C++ application we only need to include #include <windows.h> header and it should include everything we need. Here are the steps we need to include to make a minimal working GUI application:
- create a wWinMain function (instead of regular
main); this tells Windows that it is a GUI application - create a new window
- register a callback function to process messages
- start a loop to listen for dispatched messages
- on message WM_CREATE draw your application in your window
For example, here is the minimal example of a counter application written in Win32:
1
2
3
4
5
6
7
8
9
10
11
12
13
14
15
16
17
18
19
20
21
22
23
24
25
26
27
28
29
30
31
32
33
34
35
36
37
38
39
40
41
42
43
44
45
46
47
48
49
50
51
52
53
54
55
56
57
58
59
60
61
62
63
64
65
66
67
68
69
70
71
72
73
#include <windows.h>

#define ID_BTN_UP 1001
#define ID_BTN_DOWN 1002

static int counter = 0;

LRESULT CALLBACK WndProc(HWND, UINT, WPARAM, LPARAM);
void updateCounter();

HWND counterHandle;

int WINAPI wWinMain(HINSTANCE hInstance, HINSTANCE hPrevInstance, PWSTR lpCmdLine, int nCmdShow) {
    MSG msg;
    WNDCLASSW wc = {0};

    wc.lpszClassName = L"Counter application";
    wc.hInstance = hInstance;
    wc.hbrBackground = NULL;
    wc.lpfnWndProc = WndProc;
    wc.hCursor = LoadCursor(0, IDC_ARROW);

    RegisterClass(&wc);
    CreateWindow(wc.lpszClassName, L"Counter application", WS_OVERLAPPEDWINDOW | WS_VISIBLE, 100, 100, 375, 350, 0, 0, hInstance, 0);

    while (GetMessage(&msg, NULL, 0, 0)) {
        TranslateMessage(&msg);
        DispatchMessage(&msg);
    }

    return (int)msg.wParam;
}

LRESULT CALLBACK WndProc(HWND hwnd, UINT msg, WPARAM wParam, LPARAM lParam) {
    switch (msg) {
        case WM_CREATE:
            counterHandle = CreateWindowW(L"Static", L"0", WS_CHILD | WS_VISIBLE | SS_LEFT,
                125, 20, 120, 60,
                hwnd, (HMENU) 1, NULL, NULL);

            CreateWindowW(L"Button", L"+",
                WS_VISIBLE | WS_CHILD ,
                20, 80, 150, 25, hwnd, (HMENU) ID_BTN_UP, NULL, NULL);

            CreateWindowW(L"Button", L"-",
                WS_VISIBLE | WS_CHILD ,
                190, 80, 150, 25, hwnd, (HMENU) ID_BTN_DOWN, NULL, NULL);

            break;

        case WM_COMMAND:
            if (LOWORD(wParam) == ID_BTN_UP) {
                counter++;
                updateCounter();
            } else if (LOWORD(wParam) == ID_BTN_DOWN) {
                counter--;
                updateCounter();
            }
            break;

        case WM_DESTROY:
            PostQuitMessage(0);
            break;
    }

    return DefWindowProcW(hwnd, msg, wParam, lParam);
}

void updateCounter() {
    wchar_t counterString[32];
    wsprintfW(counterString, L"%d", counter);
    SetWindowTextW(counterHandle, counterString);
}
This will look hideously, but it will work! As I mentioned before, the controls themselves is a legacy knowledge – for anything modern, you’ll create the window/callback similarly, but inside the WM_CREATE you’ll utilize something like Direct2D graphics.
Extra resources
If you want to learn more, you can try the following tutorials, which should be more comprehensive:
You can also check the source code for the pomodoro timer application here.